![]()
![]()
![]()
![]()
![]()
![]()
![]()
![]()
![]()
![]()
![]()
![]()
![]()
![]()
![]()
|
|
|
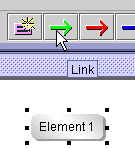
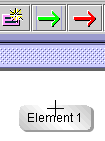
| Creating a linkItems of information are usually linked to other items. For instance, activity "A" is linked to activity "B" because "A" has to be carried out before "B", or person "C" has to carry out activity "D". These items of information can be linked by arrows in i2Brain. 3 typesThere are 3 types of link:
You can input a short text when you create a link. It is shown next to the middle of the arrow. (See "Options" if you always or never want to be asked for a text.) It is possible to connect the same two items with more than one link, but it isn't recommended because it is difficult to use. Use
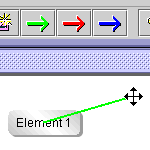
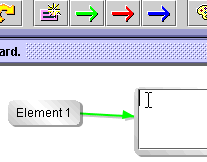
Alternatively you can right-click the element which is to be the arrow's source. In the pop-up menu choose "Links", then the required type of link. The rest is as above. Creating a link and an item togetherIf you want to create a new item and a link at the same time, you can click one of the arrow-buttons in the toolbar, then click on the item from which the arrow should emerge. Then drag the mouse (with the left mouse-button still pressed) to the point where you want the new item. Here you release the mouse-button.
Producing several links of the same typeDouble-clicking one of the arrow icons in the toolbar Of course you can combine this functionality with the one described in the previous paragraph to produce several new items, all with links. You leave this mode by clicking the view's background or one of the arrow buttons in the toolbar. Deleting and editing linksUse:Right-click the arrow and choose "Delete" or "Properties". "Properties" allows you to change the text which appears beside the arrow. |