![]()
![]()
![]()
![]()
![]()
![]()
![]()
![]()
![]()
![]()
![]()
![]()
![]()
![]()
![]()
|
|
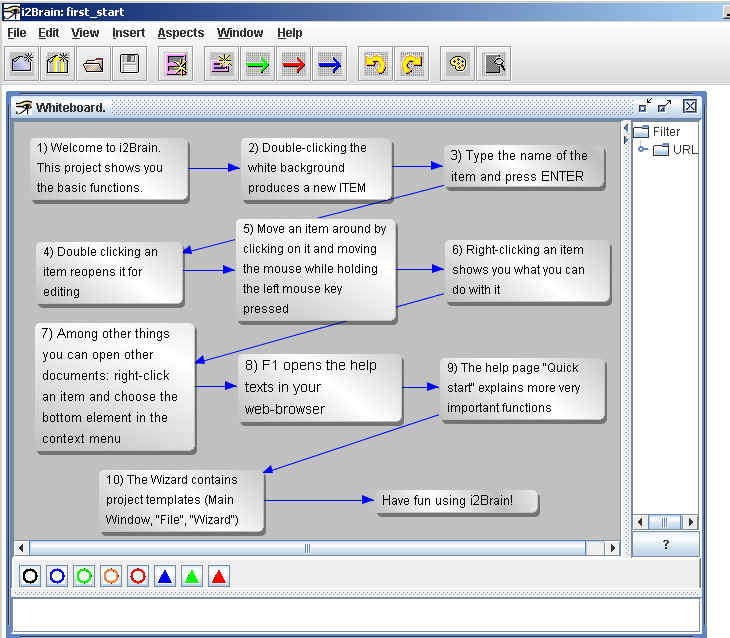
Starting i2BrainThis is the main window of i2Brain. It appears in the top left of your screen when you start i2Brain.
Depending on your operating system and the adjustments you made to it, the frame may look a little different. Before version 3 the "views" appeared outside the small main window. Starting with version 3 the views are all inside the main window and only the latter has a menu. The term "views" was chosen to reinforce the point that such windows are used to "view" your information. The first time you start i2BrainThe very first time i2Brain starts, you see a particular project which describes some of the most important actions in the program:
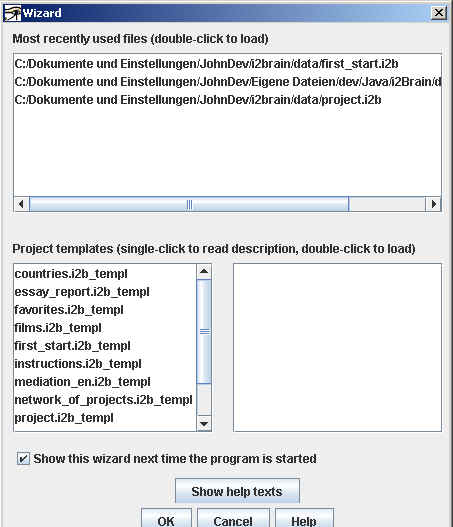
The WizardUsually the wizard will appear when you start the program. This allows you to load project templates, which are a good way to get to know what i2Brain can do.
Read more about the wizard here. Creating a new viewi2Brain's purpose is to let you view your information in various ways and from different viewpoints. There are currently two types of view. The simplest is the "whiteboard". In the main window's menu, click "File", "New" and "New whiteboard". (We use the notations "File | New | New whiteboard" to describe these steps in this document). A dialog (small window) opens, in which you can enter the name of the view. Enter "My test view" and click "OK" (or press ENTER). A second window opens - your new "view" with the title "Whiteboard My test view".
Creating a new itemYou input your information into "items". (Since this is one of the most common activities w hen using i2Brain, there are three ways of doing it, so you can choose the one most convenient for your requirements.) UsageDouble clickWhen you double-click the background of a view, a new item appears so that you can input all of its details. Using the menuIn a view's menu, you click "New | New Item" to create a new item, which appears at the top left of the view. Input the "name" of the item and press the ENTER key. (It is very important to complete your data entry with the ENTER key.) Using the context menuPressing the right mouse-key on the background of a view opens the so-called "context menu", which offers a number of actions. Click "New item". Editing an itemSimply double-click an item. It opens just as it did when you created it. Notation for menus in this documentWe use the notation with a vertical line like this "View | New whiteboard" to describe the steps "Click 'View' in the menu, then click 'New whiteboard'" in this document. |